If necessary, install the TAPI driver of the telephone system and the xtelsio CTI Server on the server computer.
Install TAPI driver
If you want to use the CTI Server on a telephone system with a central TAPI driver, the installation of the TAPI driver must be carried out in accordance with the manufacturer's instructions. If the driver doesn't work after the installation immediately, the computer has to be re-booted. You modify the TAPI driver settings still later under: [Start > Control Panel > Phone and Modem Options > Advanced]. In this dialog, select the TAPI driver and then click [Configure ...].
If the TAPI drivers are installed on the client PCs or the CTI Clients use a built-in telephone connector, no additional TAPI driver is required on the server.
Install CTI Server
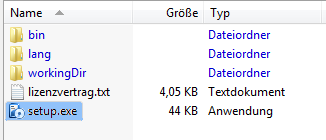
Un-zip the ZIP archive and then run setup.exe.
Follow the setup dialogs. The proposed basic settings you should usually can take over unchanged.
Working Directory
xtelsio CTI Server stores its dates and settings in the working directory that was declared by the installation. The default setting is:
%APP_DATA%\xtelsio_CTI_Server_Data\
Which working directory is currently set, is stored in the registry:
HKEY_LOCAL_MACHINE\SYSTEM\CurrentControlSet\Services\xtelsio CTI Server\WorkDir
Configure CTI Server
Basic configuration steps after the initial installation of the CTI Server:
- Import CTI Clients or create them manually
- If you have installed a multiline TAPI driver (of your telephone system) on the CTI Server computer:
- Configure outside line access code
- Each client is to be assigned authorization for its own TAPI device (TAPI-Line).
- If the TAPI drivers are only available locally on the CTI Clients (e.g. Yealink connector):
- In this case, no TAPI devices are to be assigned to the clients in the CTI Server.
Optional configurations:
- Create groups and integrate them in the CTI Client as a BLF speed dial panel.
- Integrate the common server journal in the CTI Clients.
See: Server Configuration
Install CTI Clients and connect to CTI Server
On the network workstations only the xtelsio CTI Clients are to be installed (Standard or Professional). The required Server-Connector is already included in the Client setup.
Connect CTI Client 3.x with CTI Server
- The CTI Server Connector is to be activated at:
[Options > Customize > Components and Plugins > CTI Server].
Then restart the client.
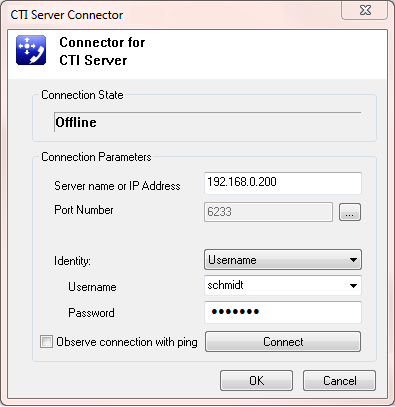
- Create and configure a new "CTI Server connection" under [Options > CTI Server].
In this dialog, enter the IP address of the CTI Server and the account data.
- It is preferable to use the Windows login name.
However, an extra password should be assigned in the CTI Server (not the Windows password).- First of all, a Client has to be created in the CTI Server ...
- Select TAPI device in the CTI Client ...
- Case 1: A central TAPI driver is available in the CTI Server and the Clients are each assigned a TAPI-Line right in the Server.
- Under [Options > PhoneDialog (TAPI device)] click "Select TAPI device".
In the following dialog the CTI Server should be displayed to the left.
Then select your TAPI device on right side.- Case 2: The TAPI device is linked locally in the CTI Client (for example a Yealink telephone, SIP SoftPhone or TAPI via USB).
- In this case, no TAPI device is to be configured in the Server.
- However, via a group in the CTI Server, e.g. a busy lamp field can be realized.
Relocation/Moving of a CTI Server installation
The CTI Server settings are saved under:
"C:\ProgramData\xtelsio_CTI_Server_Data"
You can simply copy this directory to the new server and then run the server setup. The directory contains all settings, protocols and licenses.
If the new CTI Server gets a new IP and the old CTI Server is still running in parallel, you can enter the IP of the new CTI Server under:
[CTI Server > Control > Redirect clients to another CTI Server]More information
The CTI Server runs as a background service under the "Local System" account.
If the CTI Server runs under a different account, this account also needs read and write rights to the "xtelsio_CTI_Server_Data" directory.